Showing posts with label DIY. Show all posts

Monday, October 31, 2011

Happy Halloweenie!

A lot of people dress up for Halloween and many times, I have no idea what the hell they actually are.  That is what seperates a good costume from a bad one.  Keep that in mind.

I went to two costume parties this weekend.  The most original/best costume award goes to my friend, Jane, who spent less than $16 to be a peice of sushi for Halloween.  She even made a fake grass headband to divide the sushi from the wasabi and ginger.  What a precious little thing? She looks delicious.

 Sorry, Jane.  I would award you with some sort of monetary prize, but being featured on my blog is quite an honor in itself.  ;)

Here are some more friends' costumes:

Ke$ha and Lady Liberty


Rachel Zoe (I die)

Dorothy, Holy Cow, Sunny D and Cookie Monster


Monday, October 24, 2011

DIY Week on the Today Show


I can't wake up without Matt Lauer talking to me.  No, I do not have a crush on him--he's totally not my type. I'm just a creature of habit and watch the Today Show ever morning while getting ready for work.  It doesn't feel right if Matt's not getting me out the door.  Pretty sure he isn't doing this segment, though. 

That was a tangent...anyyywayyyy

It is DIY style week on the Today Show with Bobbie Thomas.  That is, October 24-28.   If you're an arsty fartsy kind of person, click for contest details.  You could be the next DIY fashionista star. 

Even if you're not too handy with a glue gun or needle and thread, at least tune in for some inspiration.

Wednesday, October 19, 2011

Quick Halloween Costumes

I personally love Halloween and I always commit to whatever costume I am.  In the past I've been Tina Turner, Lady Gaga, and my favorite, Carrie Bradshaw.  All of my costumes have been homemade, thrifted, or pulled from my closet with a few accessories added to perfect the look.   To me, the best costumes are ones people get creative with and make all by themselves.  Not to mention, I'm a pretty practical person and don't believe in spending ridiculous money on a store-bought costume only to be left with cheap polyester that I'll never wear again (because repeating is boring). 

Here are a few idea you can easily whip together spending little money on the finishing touches.

Polka-dot dress turns into a Pretty Minnie:


Get a second use out of an old bridesmaid dress as Miss America. 
If you need to borrow one, I've got plenty...


Grab your basics, add a red neck scarf, beret and baguette to be a Frenchie:

6-French Baguette from local bakery: $2ish

Another thing...Halloween is for bright red lipstick.  There aren't many occasions to get away with such a flamboyant color, so please do indulge...

Wednesday, August 10, 2011

DIY: Fringe Shirt

This project  really didn't take much brains to figure out.  I was inspired by all of the fringe shirts I saw at Lollapalooza (yes, I'm still on a Lolla-high) and knew I could easily do this myself.  Let's face it, it's way more fun to make something yourself and know that nobody else has it.  Such satisfaction!


So, let's get to work.  Here's how I did it:

Step 1:  Scour your drawers for an old t-shirt you don't care gets ruined or visit the thrift store to make such a purchase. 


Step 2:  Try the shirt on and mark to where you'd like the fringe to reach on your waistline.

Step 3:  Cut off the bottom hem, then cut thin strips of the t-shirt up to the designated line going all the way around the shirt.  I'd say make them about 1/4" thick.


Step 4:  Throw that baby on and style your shirt using what you already own. 


Tada!
And it only took me about 15 minutes :)

Yellow Shirt:  Thrift -- $1.99
Skinny Jeans:  Forever 21 -- 4 years old
Turquoise Sandals:  Target -- 1 year old
Colorful Beaded Necklace:  Forever 21 -- 5 years old
Watch:  Gift

Friday, May 20, 2011

DIY: Fancy Peacock Fedora

You can get this fedora on Etsy.com for $50 + s&h. OR! You can make this little number yourself!

Before I sought out this hat on Etsy, I came up with the peacock feather fedora from my own brain.  I bought a plain Fedora from Wet Seal for $10.80 not too long ago.  Though it would match with pretty much everything the way it is, I felt that it needed to be spiced up.  Originally, I thought I'd pick up with of those flowered hair clips or pins that are everywhere.  But, since I haven't been shopping, I haven't been able to do that! 

Conveniently, I had a pair of peacock earrings hanging out on my dresser--yet to be worn--see, I don't need to shop.  To be honest, I don't know why I even bought them because I'm noticing that at my old age I aim for simple studs to decorate my ears.  Anyway, I'm glad I got them.  They're from Forever 21 and were $4.80.  Sorry there is no link to them; I can't find them on the F21 website.  Trust me, they're from there.  I wouldn't lie. Instead of a flower pin, I figured the peacock earrings would be a much more fantastic way to spruce up the hat!  I simply staggered them on the hat.  See here:

(do you notice my studs ;) )

Like I said, the idea of this hat was in my head long before I found the Etsy version.  Actually, it was AFTER I created mine that I did an online shopping search to see if there were peacock fedoras for sale .  I was curious to see what was available and at what price they were being sold. 
My answer: $50 (the cheapest!). 
Do you know how excited I was to know that mine cost me roughly $16?  Pretty excited!

Sooooo, not only do I have a pair of earrings to wear at some point in time (if I ever get over my ridiculous complex that I'm too old for these earrings), but I also have my fedora to either wear as-is or jazz up with other fantastic accessories (that I plan on purchasing once June 9th hits (if I can stay strong, this is a verrry difficult challenge for a "shopping is my hobby"-single girl-who lives alone, like me!))! 

I must say... I like my innovative, less expensive, DIY project better than the Etsy version.

Things like this make my day!!!

Thursday, February 24, 2011

Design it yourself!!!

My mom saw this on the Today Show this morning.  Bobbie Thomas did her "Bobbie's Style Buzz" segment on how to design jewelry, shoes, bags, clothes, coats, and interior decorations yourself! 

Take a look:  Design it yourself!
(The videos scroll on the left---make sure to watch the top clip!)


Here are the websites she references:
Interior Designs: http://www.inmod.com/

Though some of the prices for these items aren't necessarily a "$teal", they are an investment.  If you are creating something that might have sentimental value, you plan to have for a long time, or is the exact way you would like something, then it may be worth putting forth the money. 

Have fun designing!

...and "Thanks" Mom <3 


Tuesday, February 22, 2011

My way--

I did my own peek-a-boo lace bra look which I had previously posted about here. 

 Just wanted to share so that you could relate to someone who is just an Ordinary-Jane.  You can be just as stylish as your favorite celebrity!

Sunday, January 30, 2011

One Shoulder Bow

The one shoulder bow is everywhere!  I love the girly look it adds.


I decided it would be pretty easy to make my own.  I just added a pin to the backside so I can attach it to whatever I feel like needs a bow!

I used ribbon to create mine.  It was my first sewing project ever!
  I figured it would be something easy for a beginner.


I could pin this on a plain fitted tshirt, a sleeveless blouse, a little black dress...
...the options are endless...

Saturday, January 22, 2011

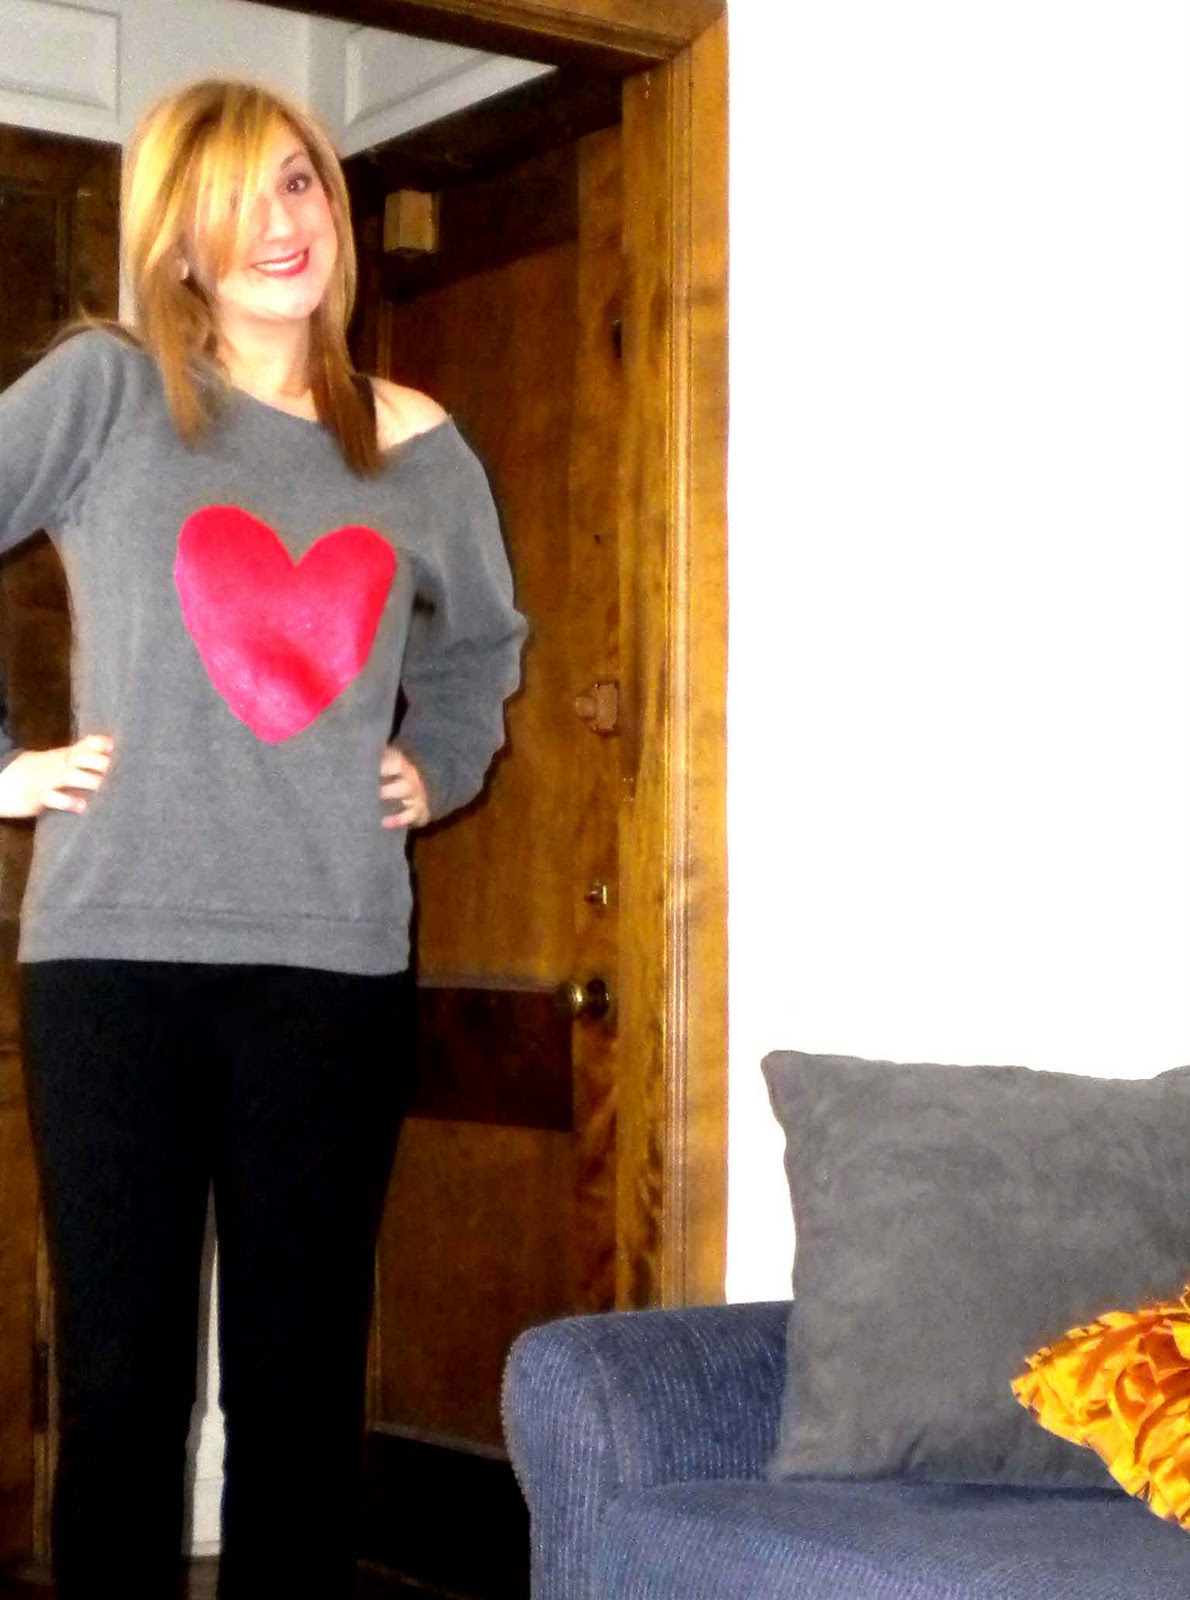
DIY: Taylor Swift Heart!

Go figure...Taylor Swift is wearing a shirt with a big heart on it!  (I love her!)
I thought it was cute and could recreate it myself. 
My cousin and I made it our project for the day.


1-I drew a big heart on a piece of cardboard and cut it out with a box cutter. 
Little Wiggles was helping me. 


2-So this is what I used as my stencil. 


3-Next, I cut the collar off of a $2 boy's sweatshirts purchased at a thrift store. 
I decided to go with grey instead of white.


3-Then I placed the stencil in the middle of the shirt and started dabbing
a red fabric paint on the shirt with a sponge brush. 
 I got all of my supplies at Michael's. 


4-I let the shirt dry according to the recommended time given by the paint bottle. 
Soon it was ready to wear!  
 Just make sure that when you wash the shirt, you turn it inside-out. 

Ta da!

This was a fun one for me.  :)

Wednesday, January 12, 2011

I cleaned out my closet!

It is such a good feeling to organize and get rid of things that are wasting space.  Here is what my closet looked like when I woke up this morning:

It clearly was a disaster, so I decided it was time for it to get a deep cleaning.  I tried on everything I hadn't worn in a while; bottoms with a plain black fitted t-shirt and tops with my favorite skinny jeans.  I got the best idea of fit this way. 

After filling two large shopping bags full of items I don't wear anymore, I took them to two nearby resale shops:   Buffalo Exchange and Crossroads Trading Co.  Combined, I got almost $70 back for my items.  What was left over I donated to a second hand store which benefits a nearby hospital.  I will get a tax credit for 25% of the total donated. 

With my earned money, I bought boxes to organize miscellaneous items that were lying around my closet making it look messy.  Here is the final product:


My closet looks amazing now!  I found so many items I forgot I owned and am looking forward to wearing soon.  It was a good day...